Last modified on September 11, 2023 at 5:56 pm
Overview
This guide shows you how to create a login application on Twitter that allows students to log in to DigitalChalk with their Twitter account.
Create a Twitter Application
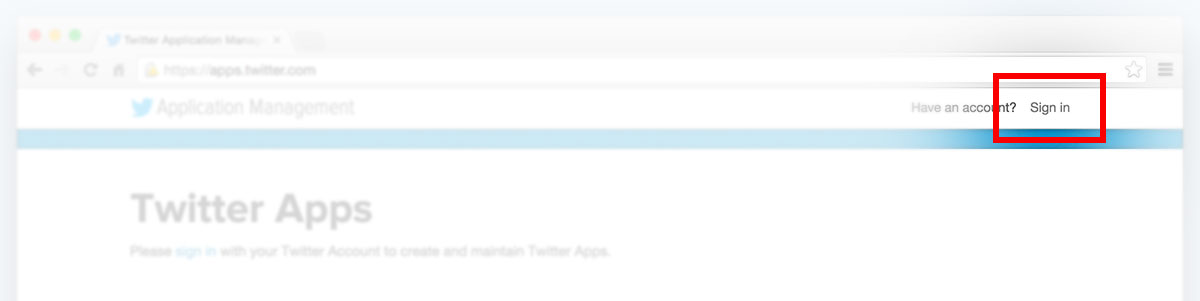
- Go to http://apps.twitter.com and log in with your normal Twitter account on the Twitter Apps page.
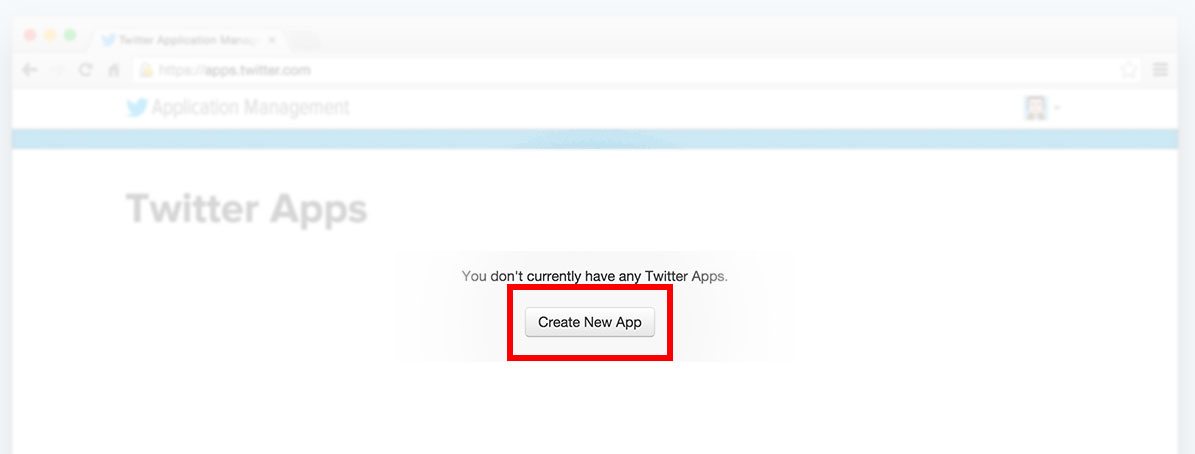
- Click the Create New App button.
- The Create an Application page is displayed.

- Enter a name for your application in the Name field. This should be a name that students will recognize, such as your company name, since it is displayed on the page students see when they first log in to DigitalChalk using Twitter.
- Enter a description for your application in the Description field. The description is displayed on the page the student sees when they first log in to DigitalChalk using Twitter.
- Enter the URL of your primary website (not your DigitalChalk site) in the Website field. For example “http://www.mycompany.com”. The website is displayed as a link on the page the student sees when they first log in to DigitalChalk using Twitter.
- Enter the following URL in the Callback URL field:
- Replace [myvirtualhost] with your DigitalChalk virtual host (for example, https://wayne.digitalchalk.com/dc/signin/twitter)
- Check Yes, I agree under the Developer Agreement section.
- Click the Create your Twitter Application button.
- The Dashboard for you new application is displayed with the Details page for the application.
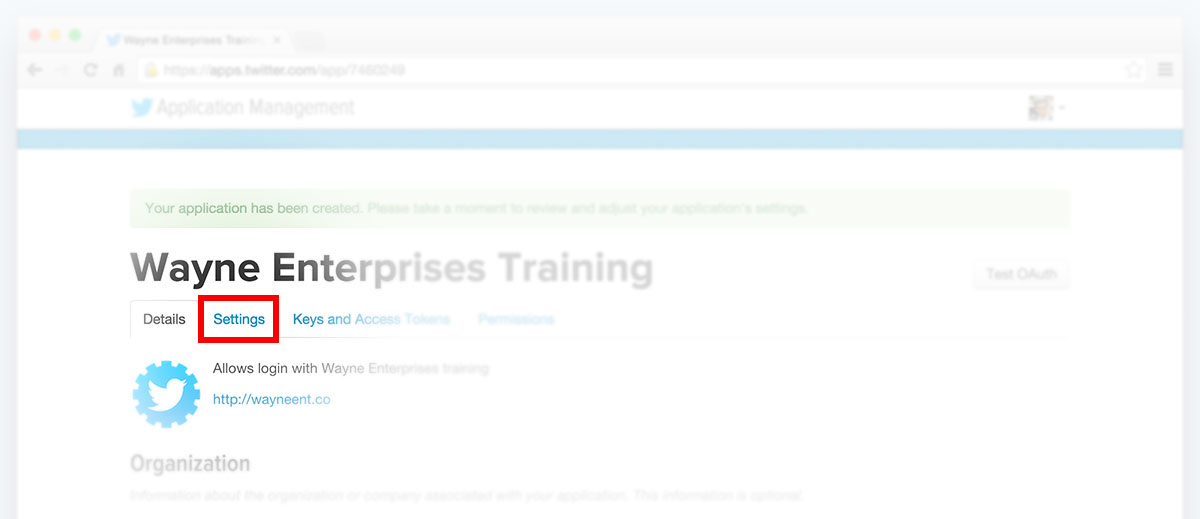
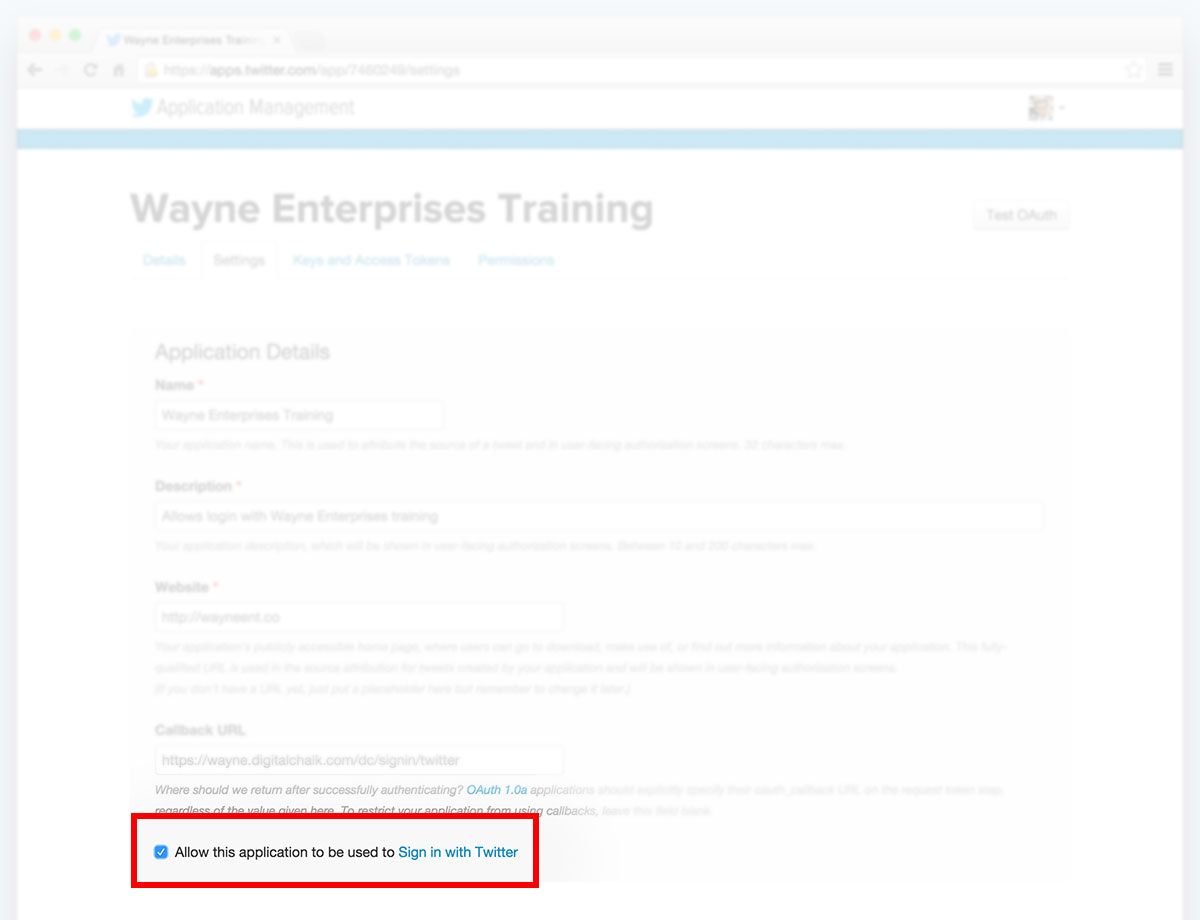
- Click the Settings tab
- The Settings page is displayed. The Name, Description, Website, and Callback URL fields are filled in for you with the information you entered on the Create an application page.
- Check the Allow this application to be used to Sign in with Twitter checkbox.
The following fields are optional, but if you enter information in any of these fields, it is displayed on the page the students see when they first log in to DigitalChalk using Twitter.
- Click the Browse button in the Application Icon to select an image to upload as your company’s icon. This logo is displayed when students log in to your application with Twitter.
- Enter your company name for Organization name and your primary website (not your DigitalChalk website) for Organization website.
- Click the Update Settings button.

- The Dashboard for your application is displayed.
- Click the Permissions tab.
- The Access page is displayed.
- Click the Read Only checkbox.
- Click the Update Settings button.

- The Dashboard for your application is displayed.
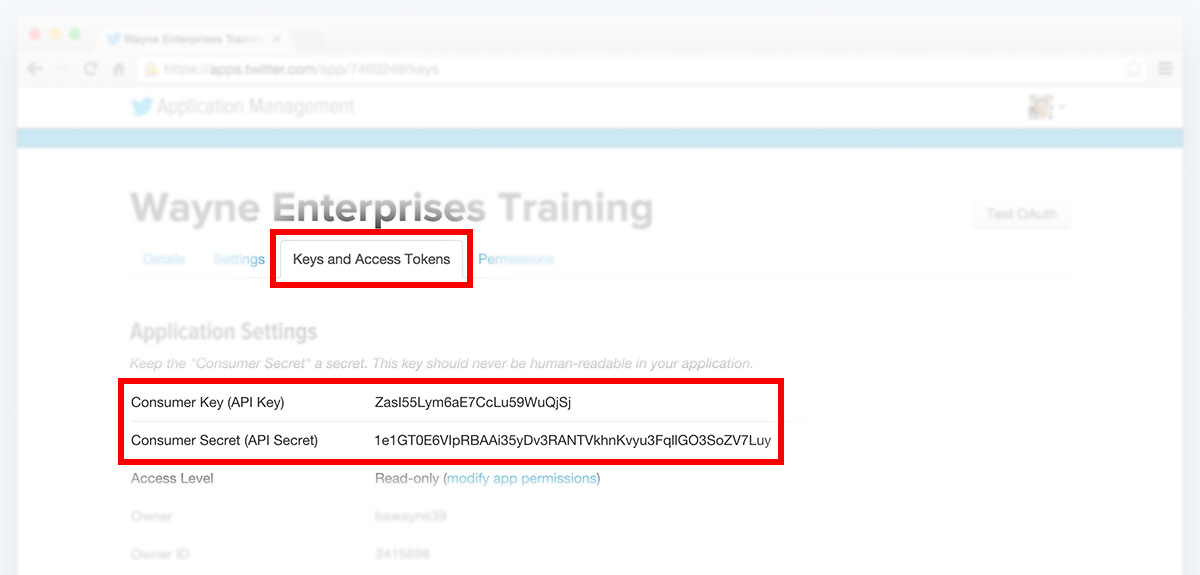
- Click the Keys and Access Tokens tab.
You don’t enter any information here, but be sure to note the values of the Consumer Key (API Key) field and the Consumer Secret (API Secret) field, as you will need them when you return to DigitalChalk to complete the setup of your Twitter application.
Configuring DigitalChalk to Use Your Twitter Application
In DigitalChalk, do the following:
- Click the Administration tab, then click My Organization from the System Management list.
- The Edit Organization Details page is displayed with a task list.
- Select Login/SSO from the task list.
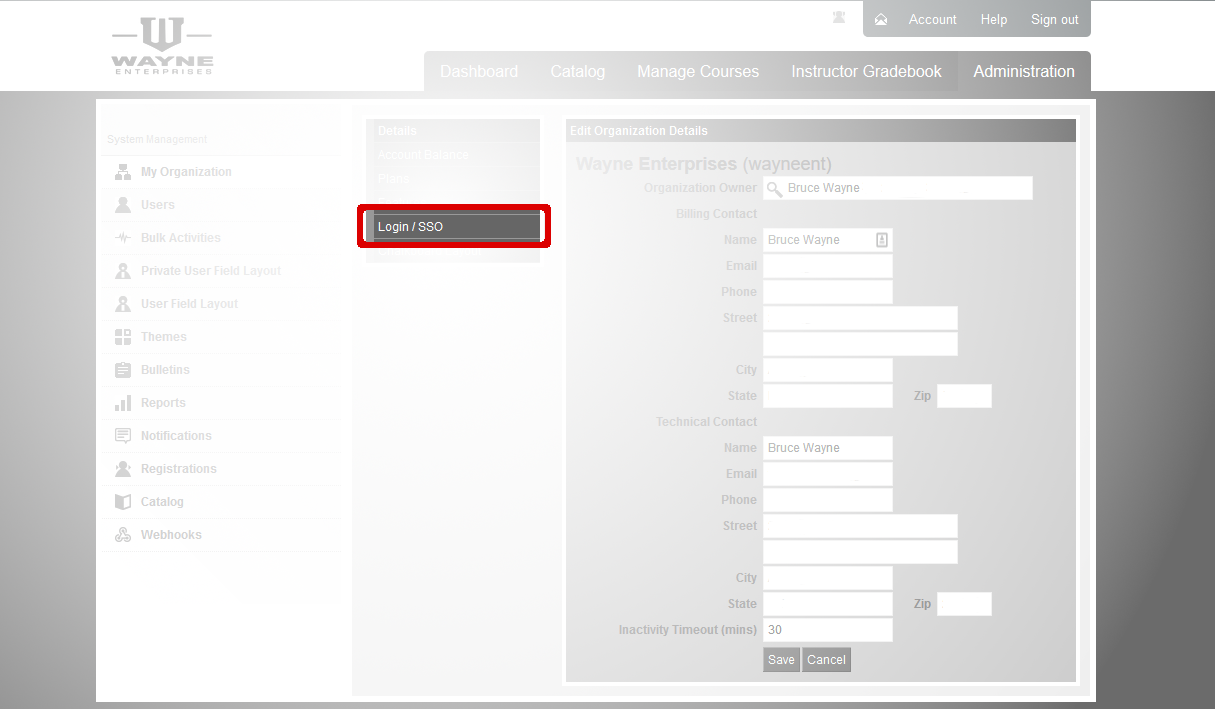
- The Login Settings page is displayed.
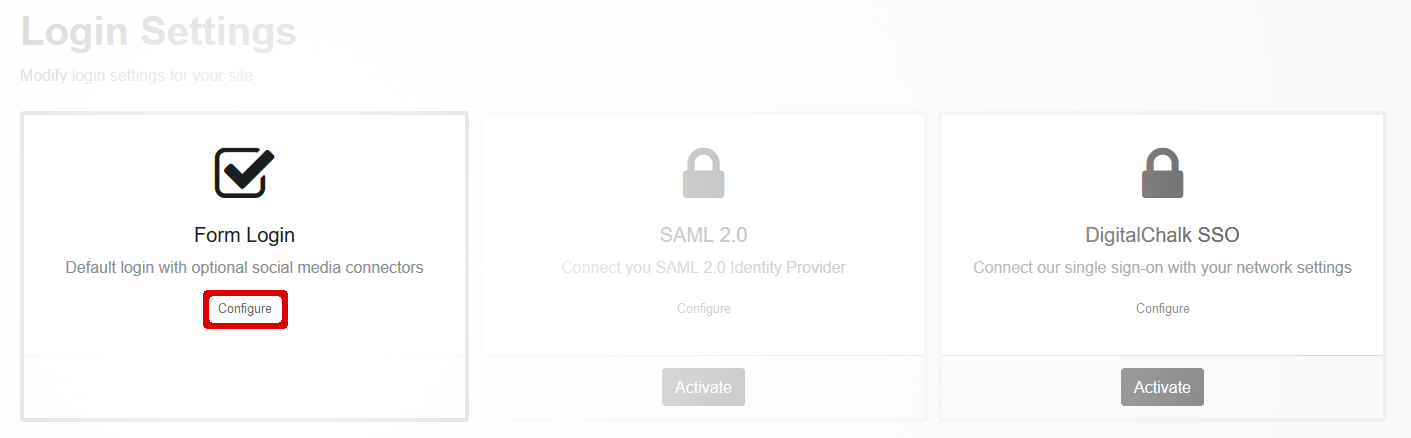
- The button under Form Login should say Activated. If not, click the Activate button under the Form Login section. Form Login is activated by default.
- Click on the Configure link under the Form Login section.
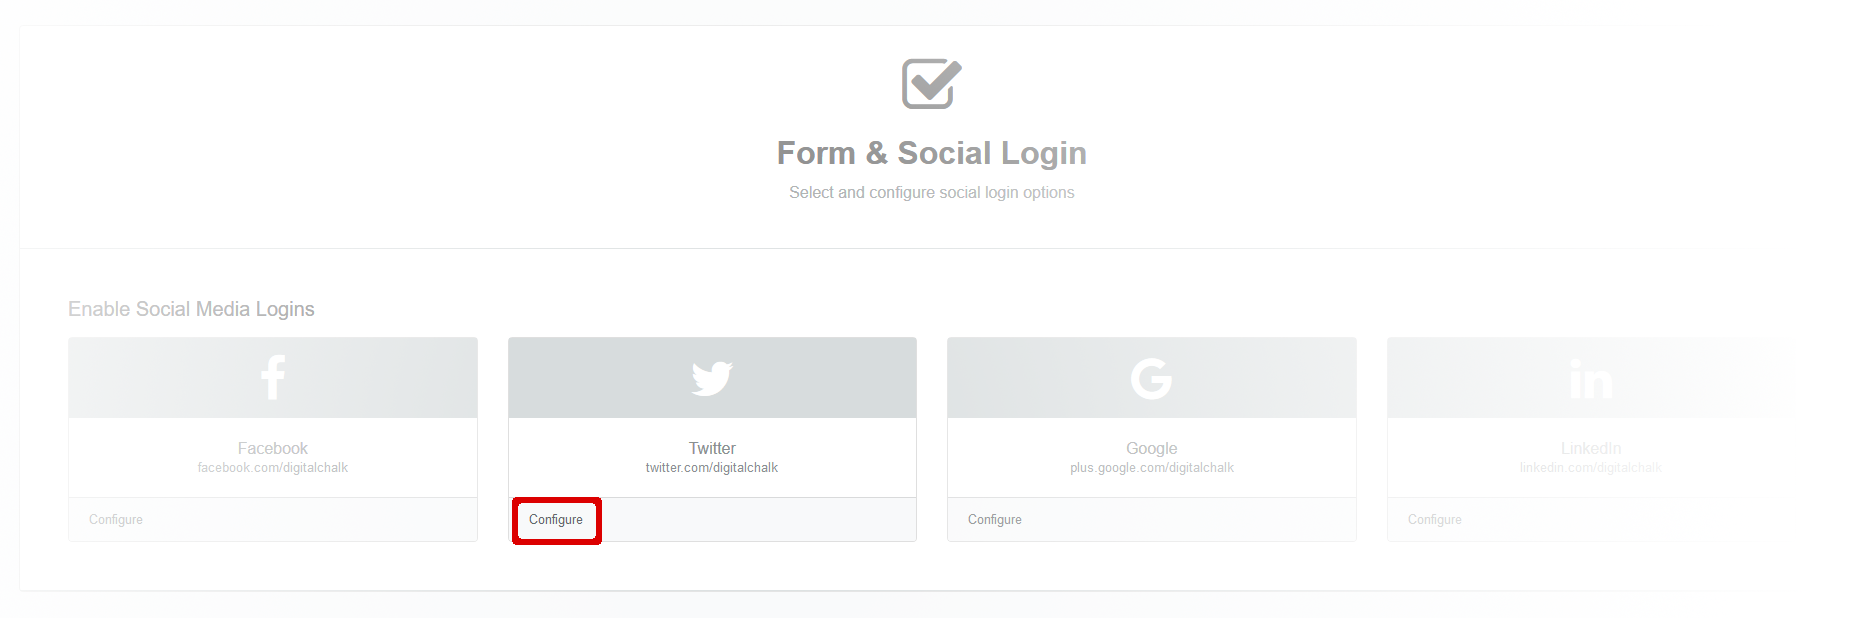
- The Form and Social Login page is displayed.
- Click the Configure link under the Twitter section. (Note: If you have previously configured Twitter, the link will say “Settings” instead.)
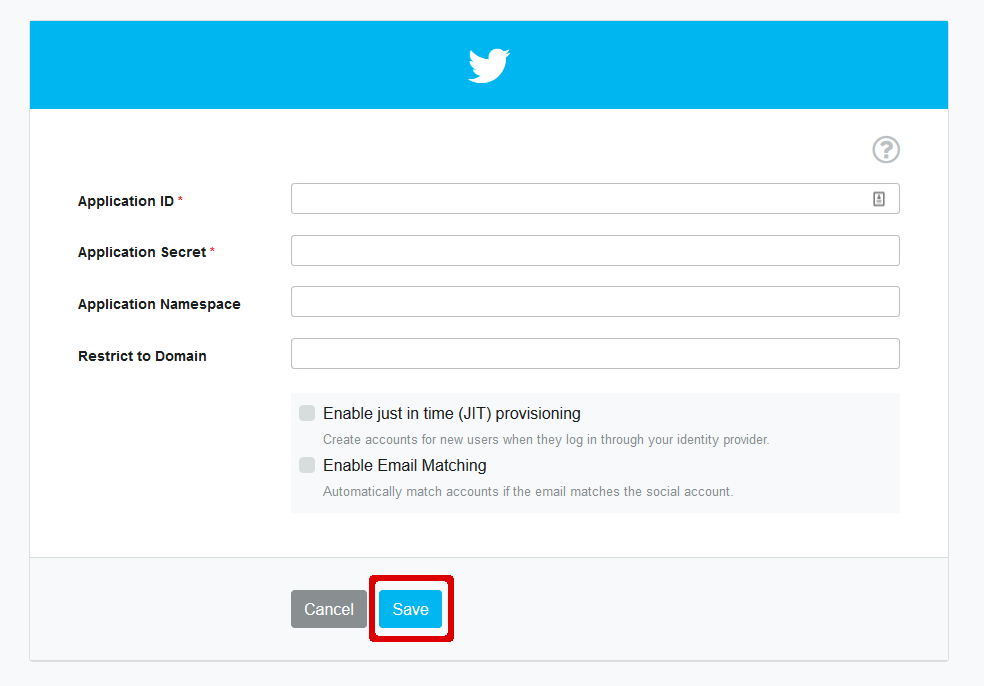
- Enter the Consumer Key and Consumer Secret values from the Keys and Access Tokens page of your Twitter application into the Application ID and Application Secret fields.
- For descriptions of other settings shown here, see Configuring Social Sites for Your Organization.
- Click the Save button when you finish entering information for your Twitter application.
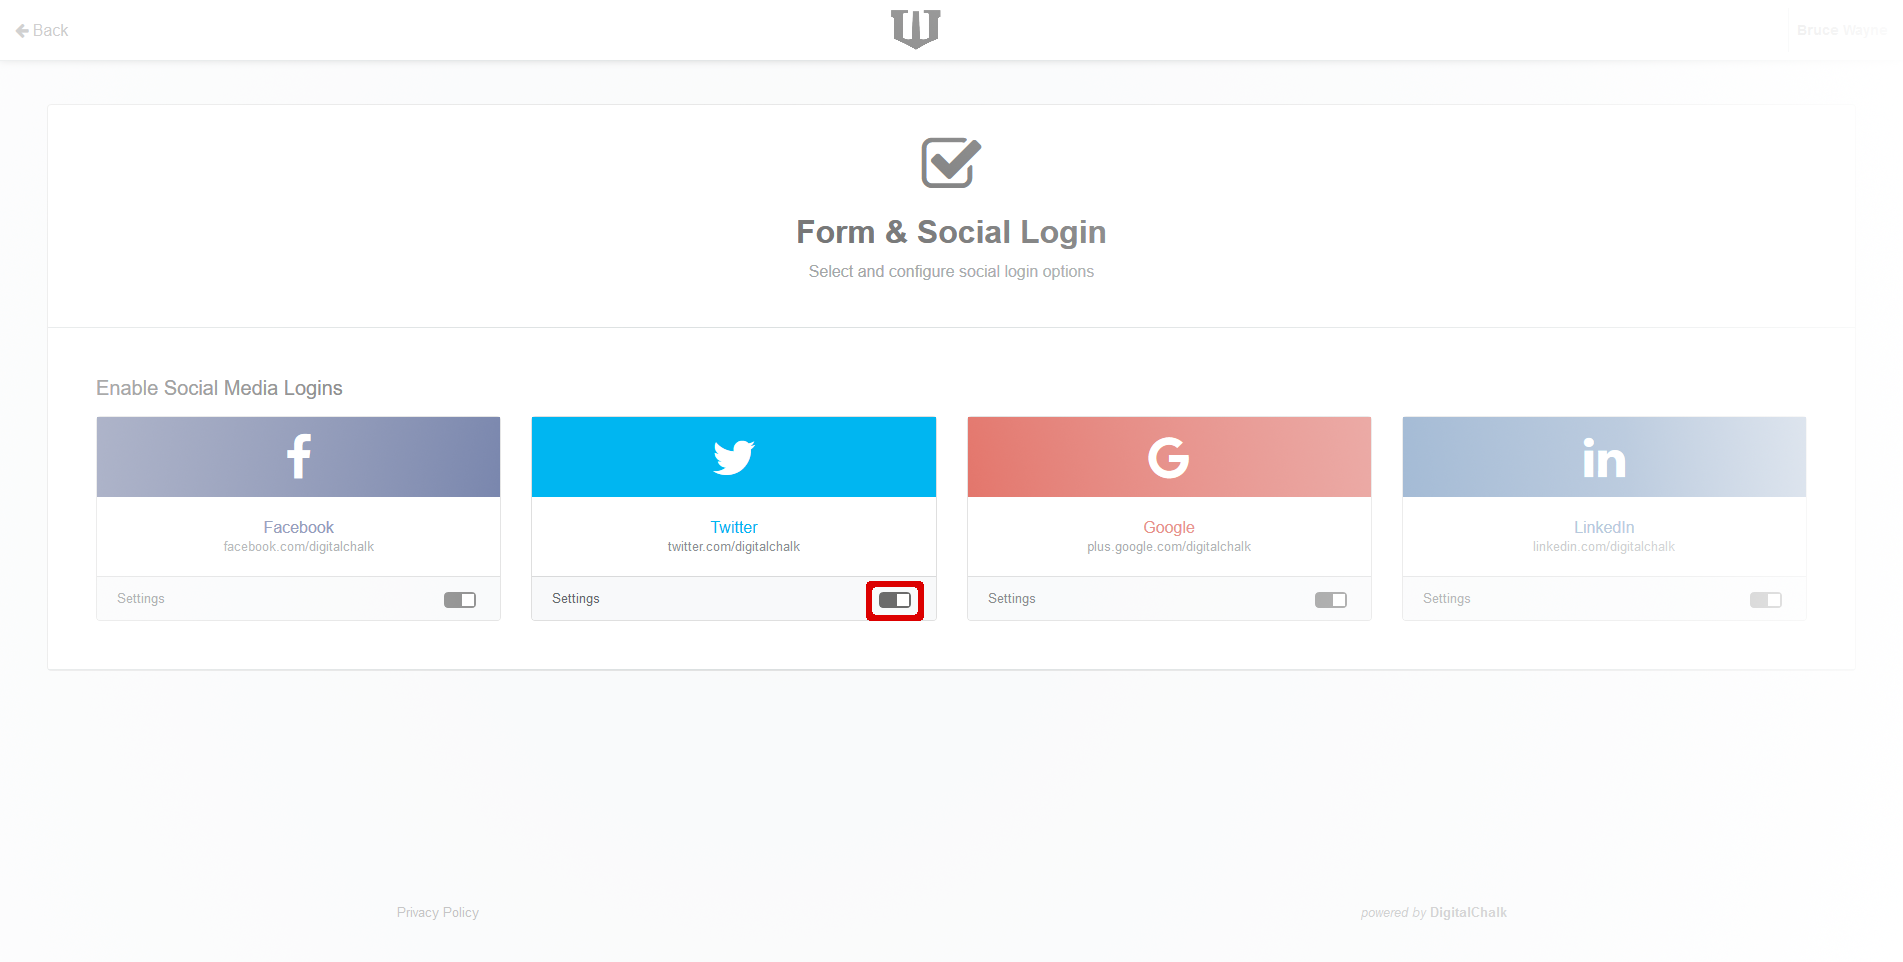
- Click the activation toggle in the Twitter section of the Form and Social Login page. This enables students to use your new Twitter application to log in to DigitalChalk.
You have completed creating a Twitter login for your DigitalChalk organization. Your students can now log in to DigitalChalk using their Twitter account. If you have any questions, please contact DigitalChalk support for assistance.
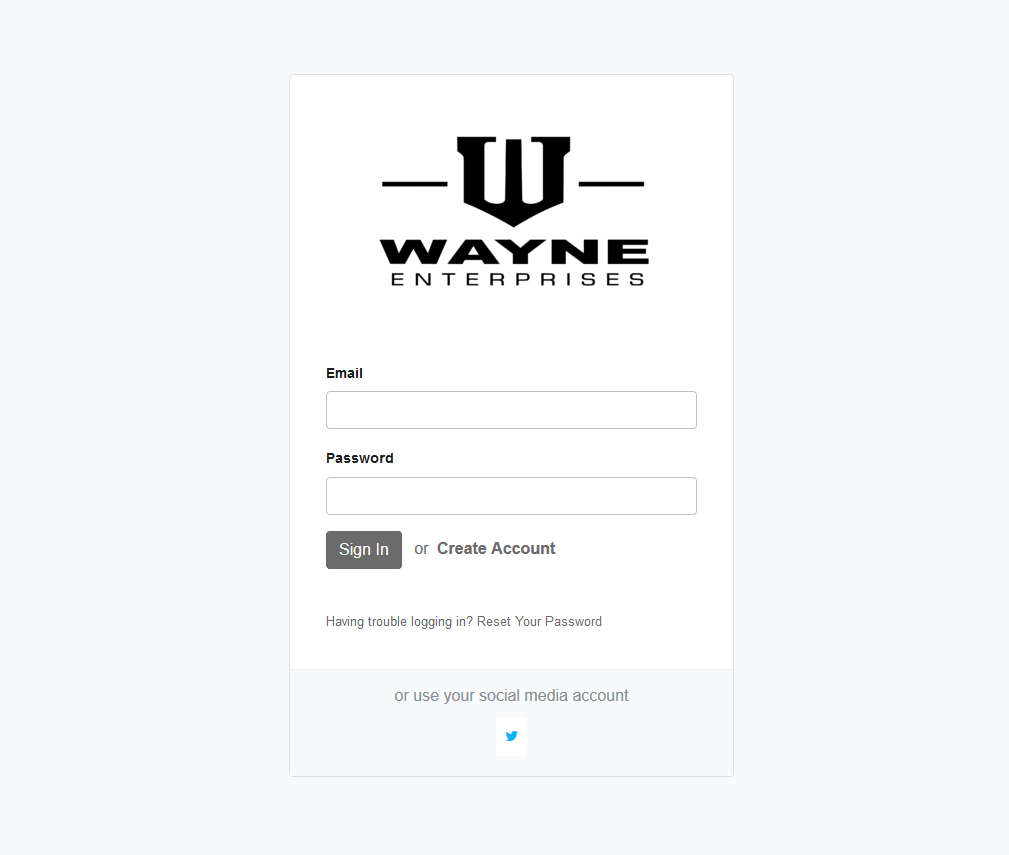
4. How Your DigitalChalk Twitter Login Looks To a Student
When students first log in to your DigitalChalk site with Twitter, they must approve the application through Twitter. The page shown here is a sample of what students see the first time they log into DigitalChalk from Twitter. The red boxes show how your settings are displayed on the Twitter approval page.