Last modified on August 24, 2023 at 6:41 pm
DigitalChalk Single Sign-On plugin for WordPress
What you will need:
- A WordPress site with Administrator rights
- A DigitalChalk instructor account
Installing the plugin
First, download the plugin file from the DigitalChalk GitHub site.
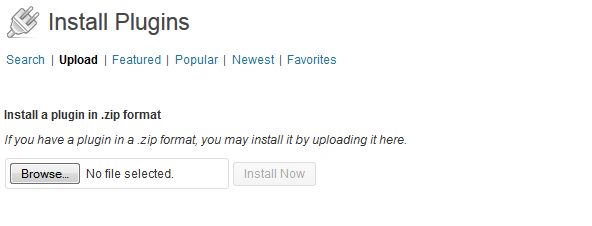
Instal the plugin’s zip file in the normal way for WordPress. Click on Plugins > Add New > Upload, then select the zip file and click install.

Activate the DigitalChalk SSO plugin on the Plugins Admin screen in WordPress by clicking on the Activate link.

Configure the DigitalChalk Single Sign-On (DCSSO) Plugin
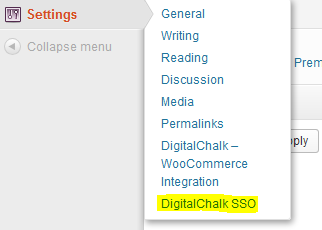
Now that the plugin is activated, go to the Settings area of WordPress and select “DigitalChalk SSO”.

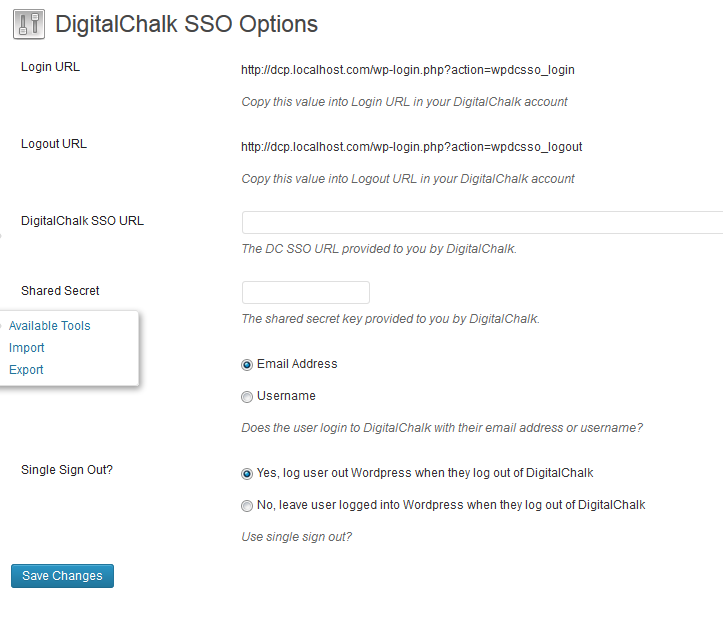
This will take you to the following properties page:

Note that the Login and Logout URLs will be filled in for you automatically. Provide these URLs to DigitalChalk Support, and they will return to you the DigitalChalk SSO URL and the Shared Key values. Enter these two values into the page and click on Save Changes.
NOTE: At this point DigitalChalk will use your WordPress login instead of the normal DigitalChalk login page. Make sure your WordPress Admin account has the same email address as your DigitalChalk Admin account, and that you know the password in WordPress. If you lock yourself out of DigitalChalk, you will need to contact DigitalChalk support for help.