Last modified on September 11, 2023 at 5:55 pm
Overview
This guide shows you how to create a login application on Facebook that allows students to log in to DigitalChalk with their Facebook account.
Create a Facebook Application
- Go to developers.facebook.com and log in with your normal Facebook login on the Developers page.

- Click My Apps, then click Add New App from the drop-down menu.
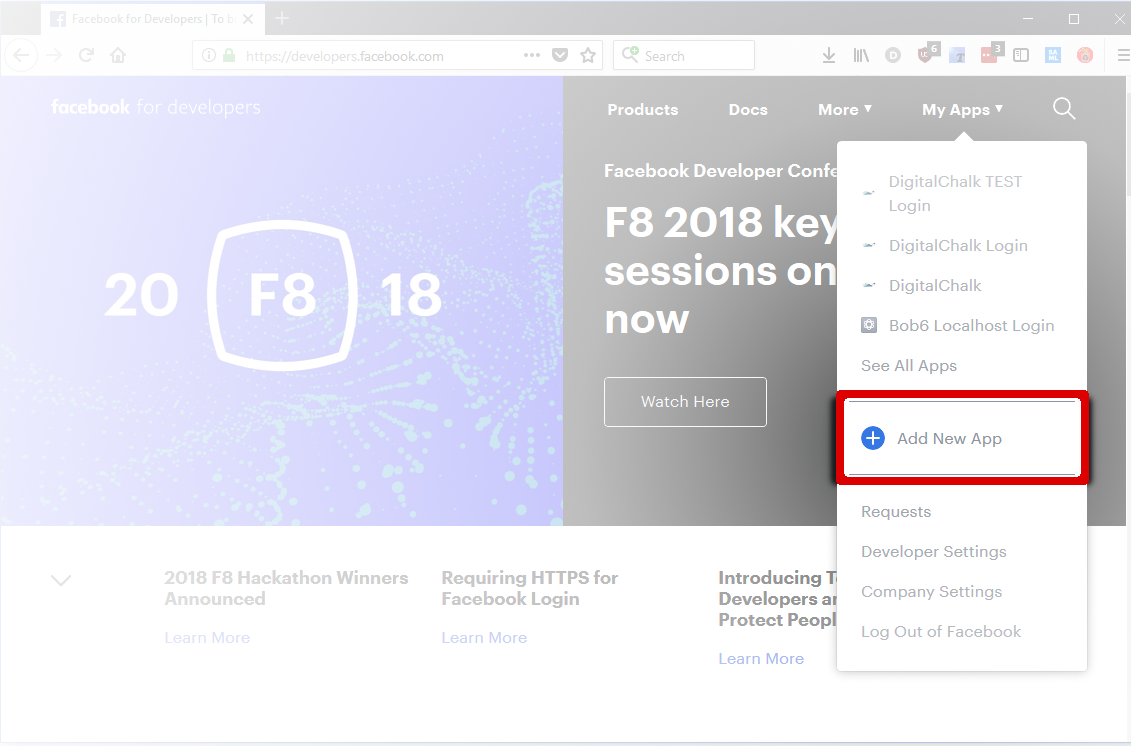
- The Create a New App ID page is displayed.
- Enter a name for your new application and provide a contact email for the application. The application name should be something your students will recognize, such as your company name, since it is displayed on the page students see when they first log in to DigitalChalk using Facebook.
- Click the Create App ID button.

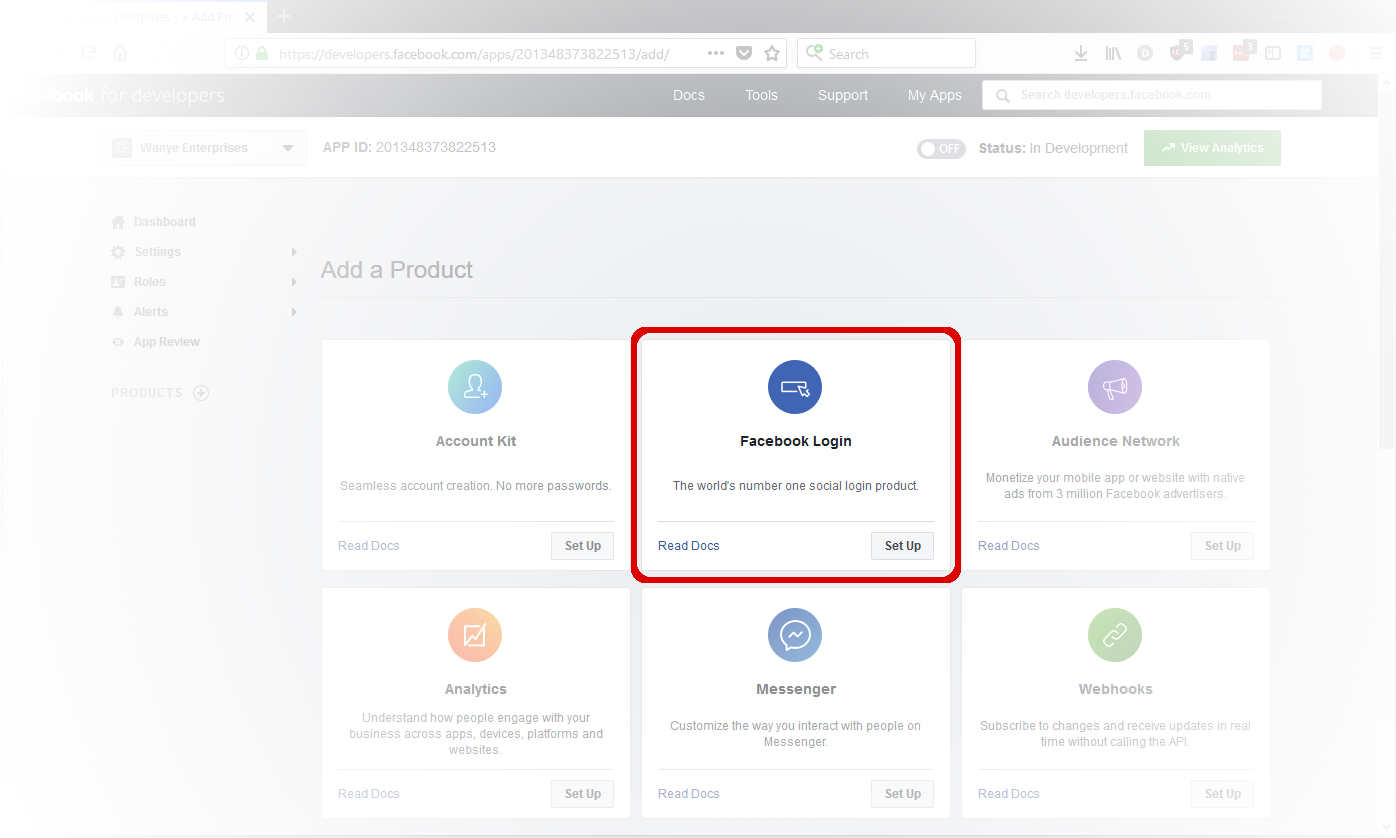
- The Add a Product page is displayed.
- Find the Facebook Login product in the list.
- Click the Set Up button.
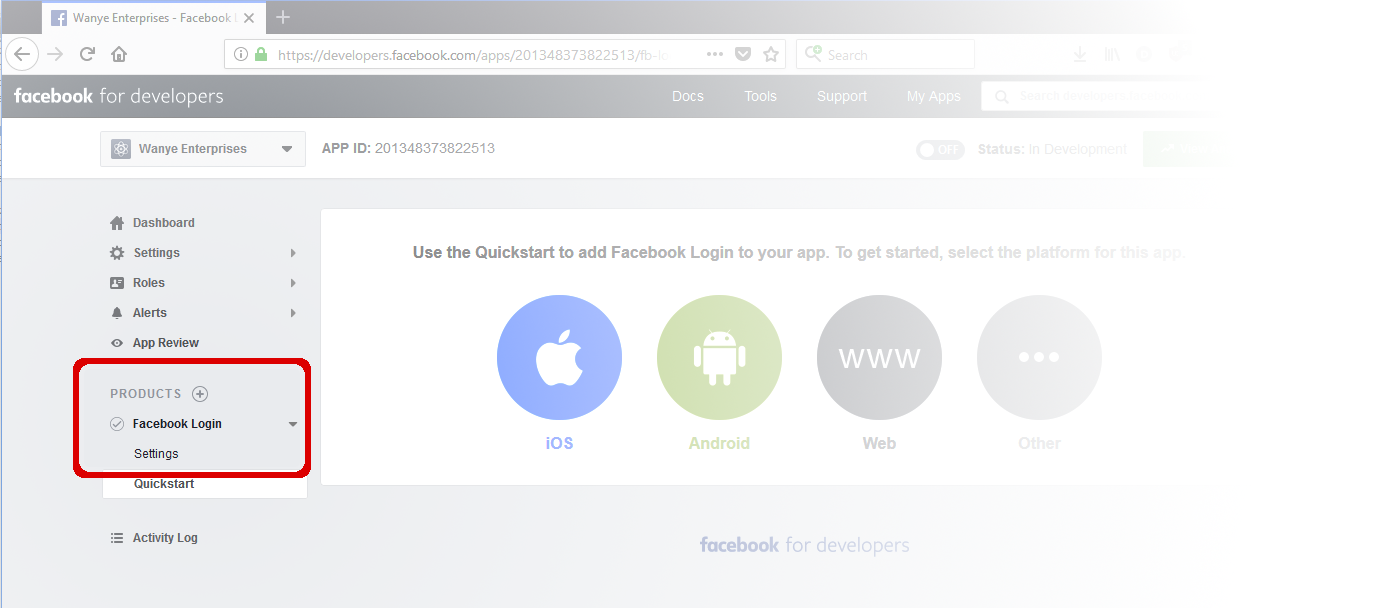
- The Quickstart for Facebook Login page is displayed. Since we won’t be using Quickstart, ignore the four options in the middle.
- Click the Settings link under Facebook Login in the Products menu on the left.
- The Facebook Login Settings page is displayed.
- In the Client OAuth Settings section, make sure that Client OAuth Login, Web OAuth Login, Enforce HTTPS, and Use Strict Mode for Redirect URIs are set to Yes, and all the other security settings are set to No.
- Enter the following in the Valid OAuth redirect URIs field: https://[myvirtualhost].digitalchalk.com/dc/signin/facebook
- Replace [myvirtualhost] with your DigitalChalk virtual host (for example, https://wayne.digitalchalk.com/dc/signin/facebook)

- Click the Save Changes button at the bottom of the page.

- Click the Settings link (under Dashboard), and then the Basic link.

- The Basic Settings page is shown.
- Click on the Show button next to the App Secret field.
- Note the App ID and App Secret shown on this page. You will need them later when we complete the connection on the DigitalChalk website.
- Click on the App Icon symbol.
- Upload your company logo here. This logo is displayed when students log in to your application with Facebook.

- Click the Save Changes button.
Configuring DigitalChalk to Use Your Facebook Application
In DigitalChalk, do the following:
- Click the Administration tab, then click My Organization from the System Management list.
- The Edit Organization Details page is displayed with a task list.
- Select Login/SSO from the task list.
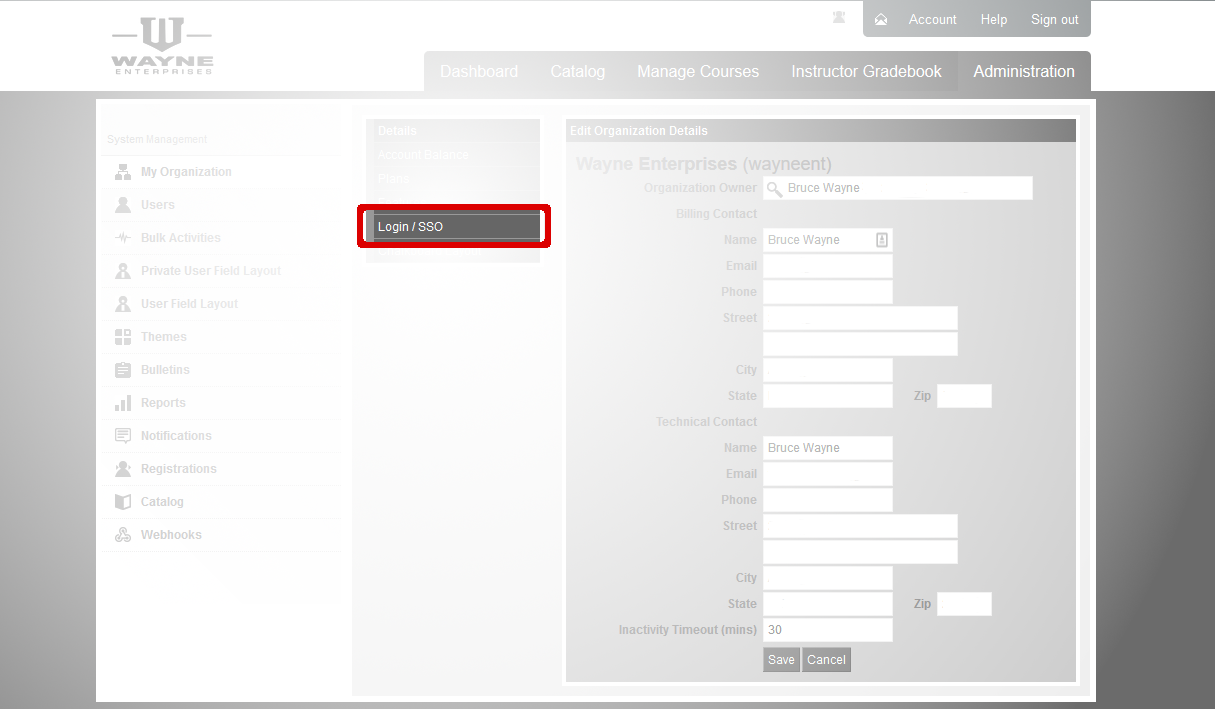
- The Login Settings page is displayed.
- The button under Form Login should say Activated. If not, click the Activate button under the Form Login section. Form Login is activated by default.
- Click on the Configure link under the Form Login section.
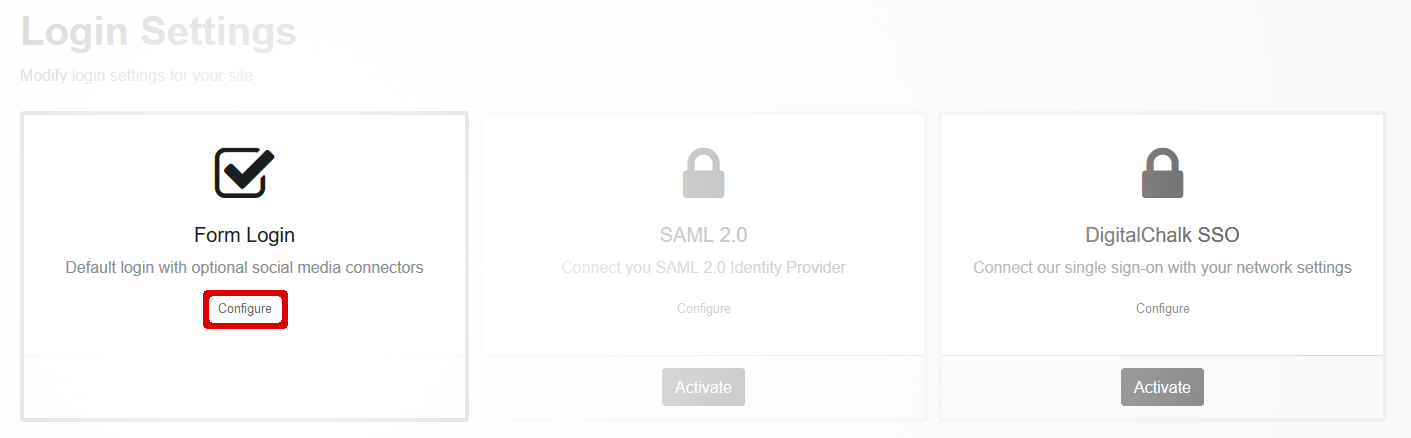
- The Form and Social Login page is displayed.
- Click the Configure link under the Facebook section. (Note: If you have previously configured Facebook, the link will say “Settings” instead.)
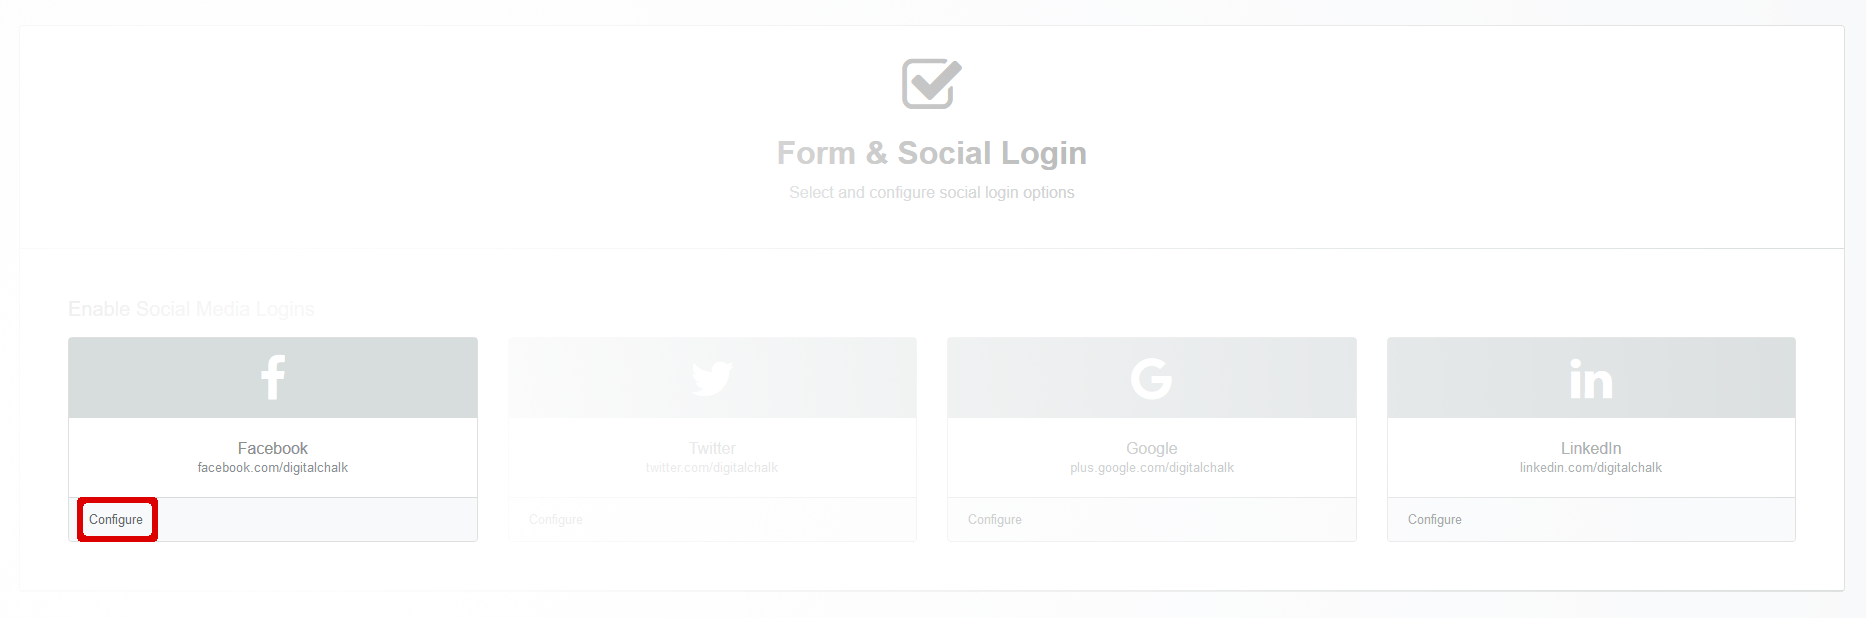
- Enter the App ID from the Facebook Basic settings for the Application ID, the App Secret from the Facebook Basic settings for Application Secret.
- For descriptions of other settings shown here, see Configuring Social Sites for Your Organization.
- Click the Save button when you finish entering information for your Facebook application.
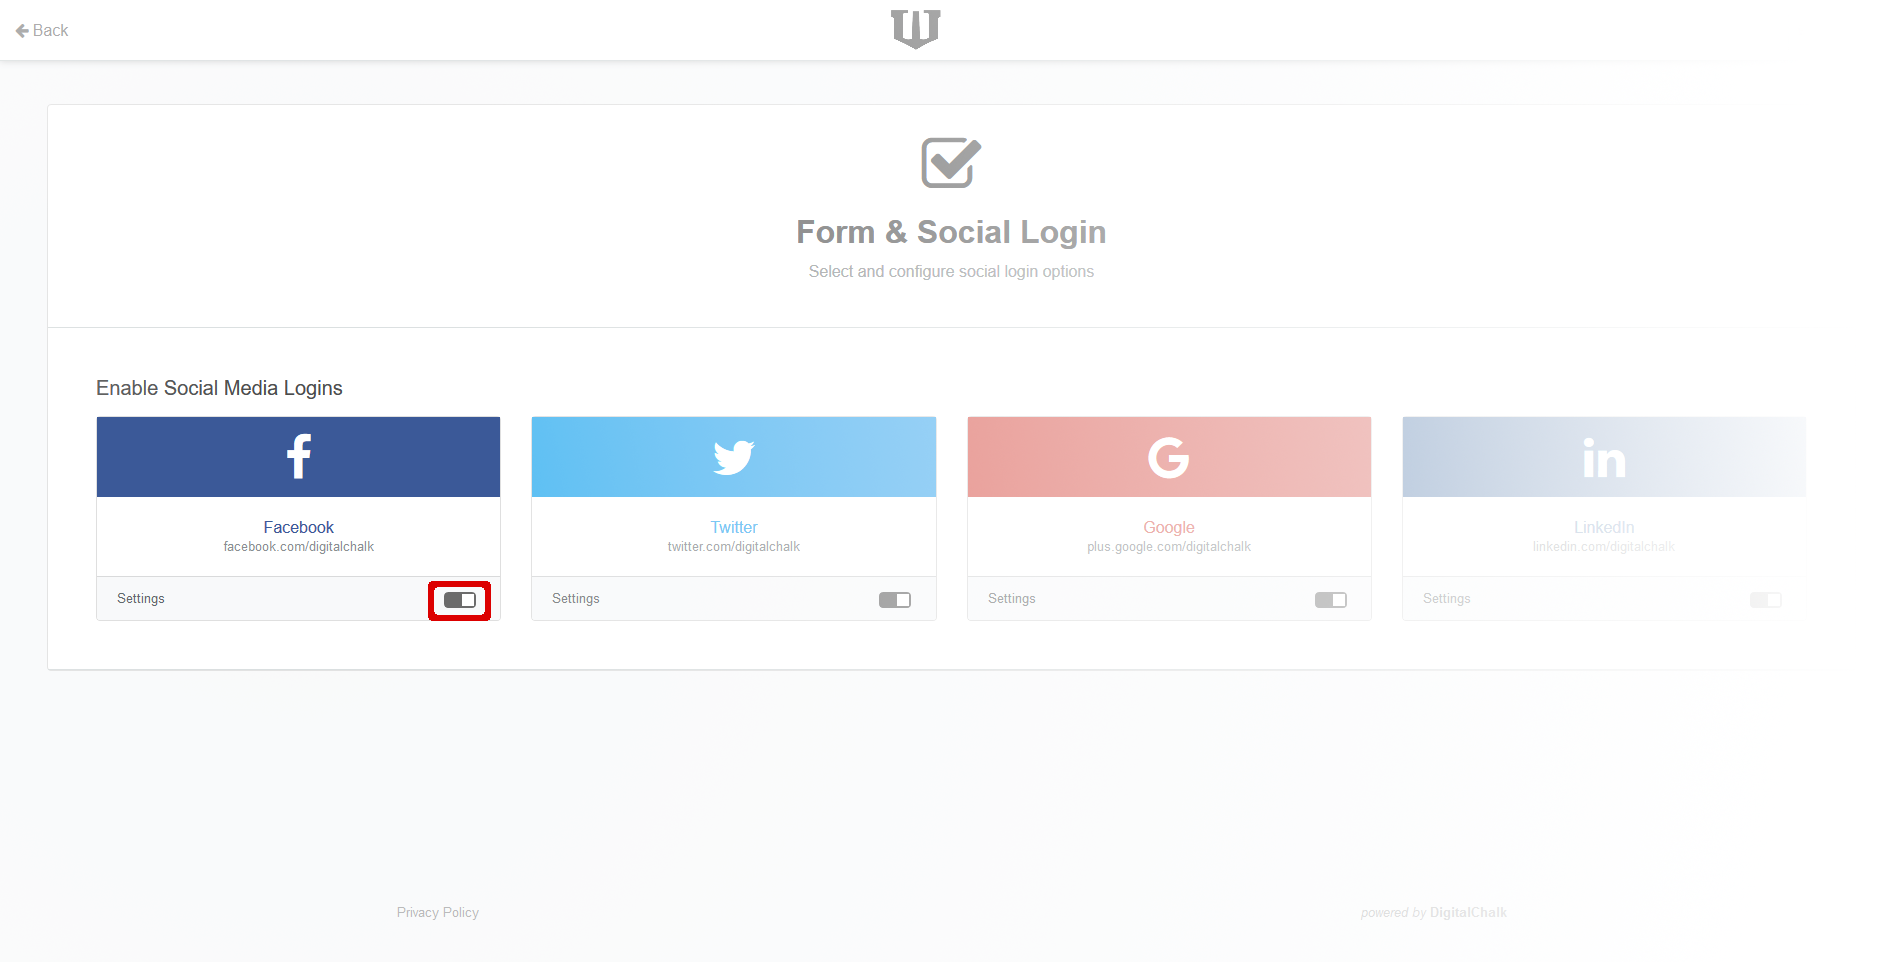
- The Form and Social Login page is shown again.

- Click the activation toggle in the Facebook section of the Form and Social Login page. This enables students to use your new Facebook application to log in to DigitalChalk
You have completed creating a Facebook login for your DigitalChalk organization. Your students can now log in to DigitalChalk using their Facebook account. If you have any questions, please contact DigitalChalk support for assistance.
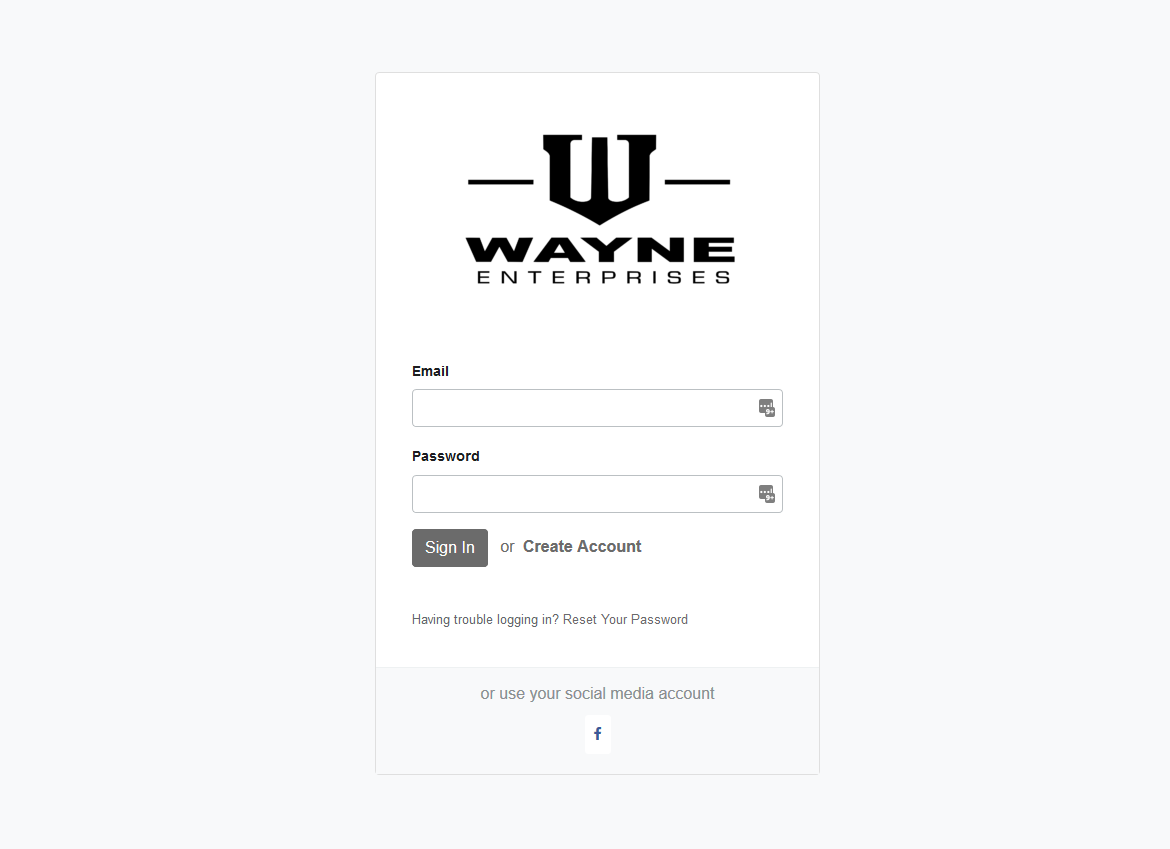
How Your DigitalChalk Facebook Login Looks To a Student
When students first log in to your DigitalChalk site with Facebook, they must approve the application through Facebook. The page shown here is a sample of what students see the first time they log into DigitalChalk from Facebook. The red boxes show how your settings are displayed on the Facebook approval page.